


Europa Mono Wheel Classic. - Wing Tip Strobes – Installing the electrical cable.
From what I can remember, we followed the steps below. You may have to make adjustments, as the process is worked through, as you see fit. This is only one way to do it. I am sure there are others.
It was very successful for us, as my aircraft was the second one we did, consequently the accuracy got a lot better. Take your time and get some help as another set of eyes and arms is helpful.
*De-rig wings, and place on saw horses/stands laying horizontally.
*With a Chalk Line or long straight edge, mark the spar from wingroot to wing tip. Aileron Bell Crank is connected to the spar for guidance. Alternatively measure distance from Aileron Bell Crank to leading edge and transfer that distance at the wing tip.
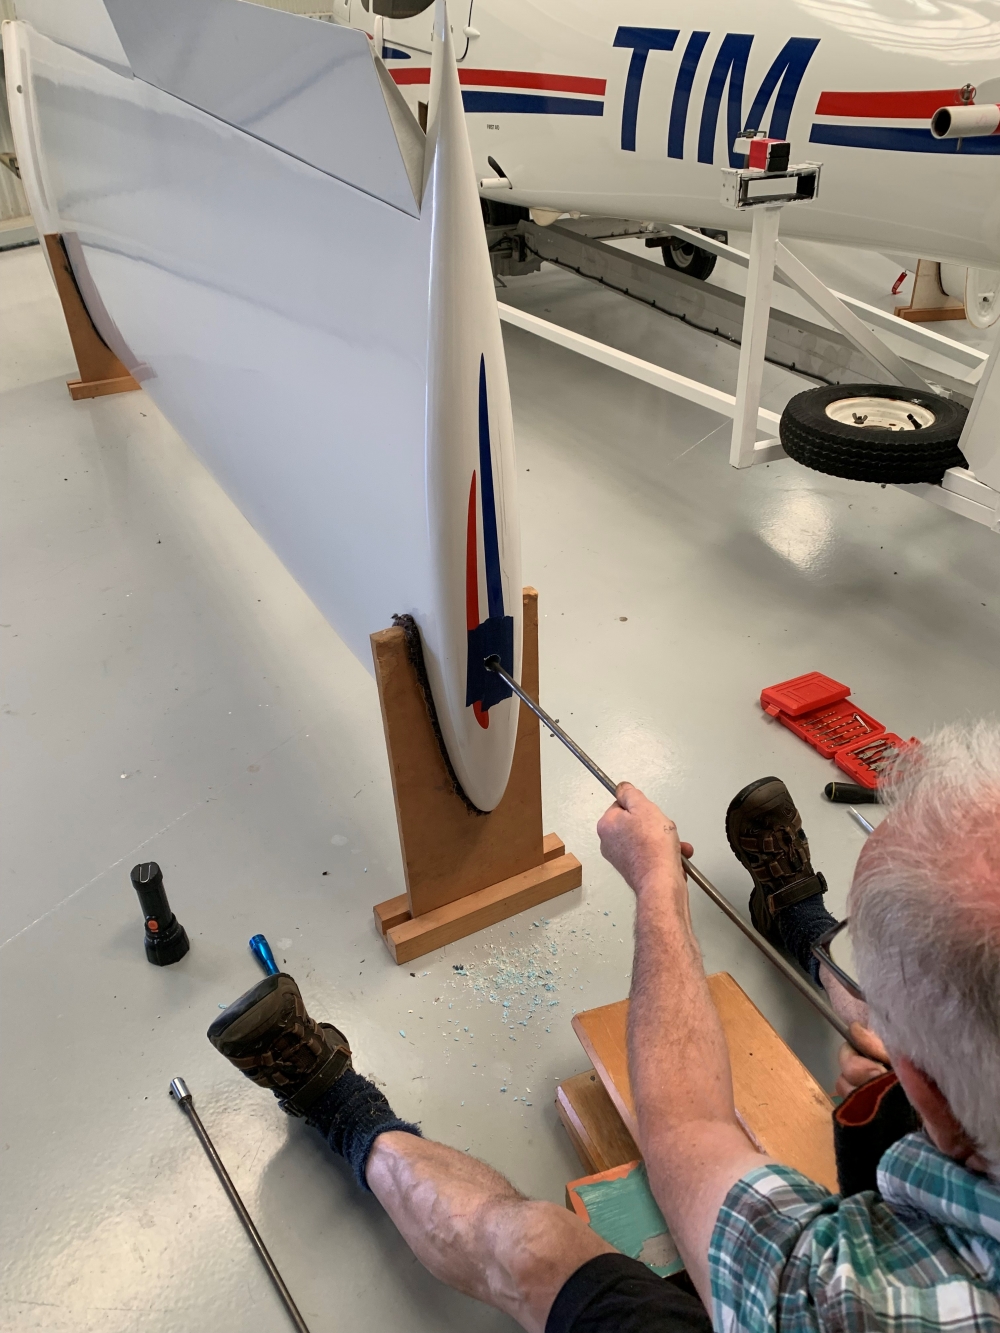
*Place wing, vertically on wing stands. See photo.
*Cable runs forward of the spar, via lightning holes in the foam, with holes drilled through reinforced barriers/spacers along the wing.
*Measure about 150mm to 200mm on the wing tip forward of the sparmark and equal distance from top and bottom. Place insulating tape over area to protect it. See photo.
*Use a 1/4 inch drill to drill through the tip surface and foam initially.
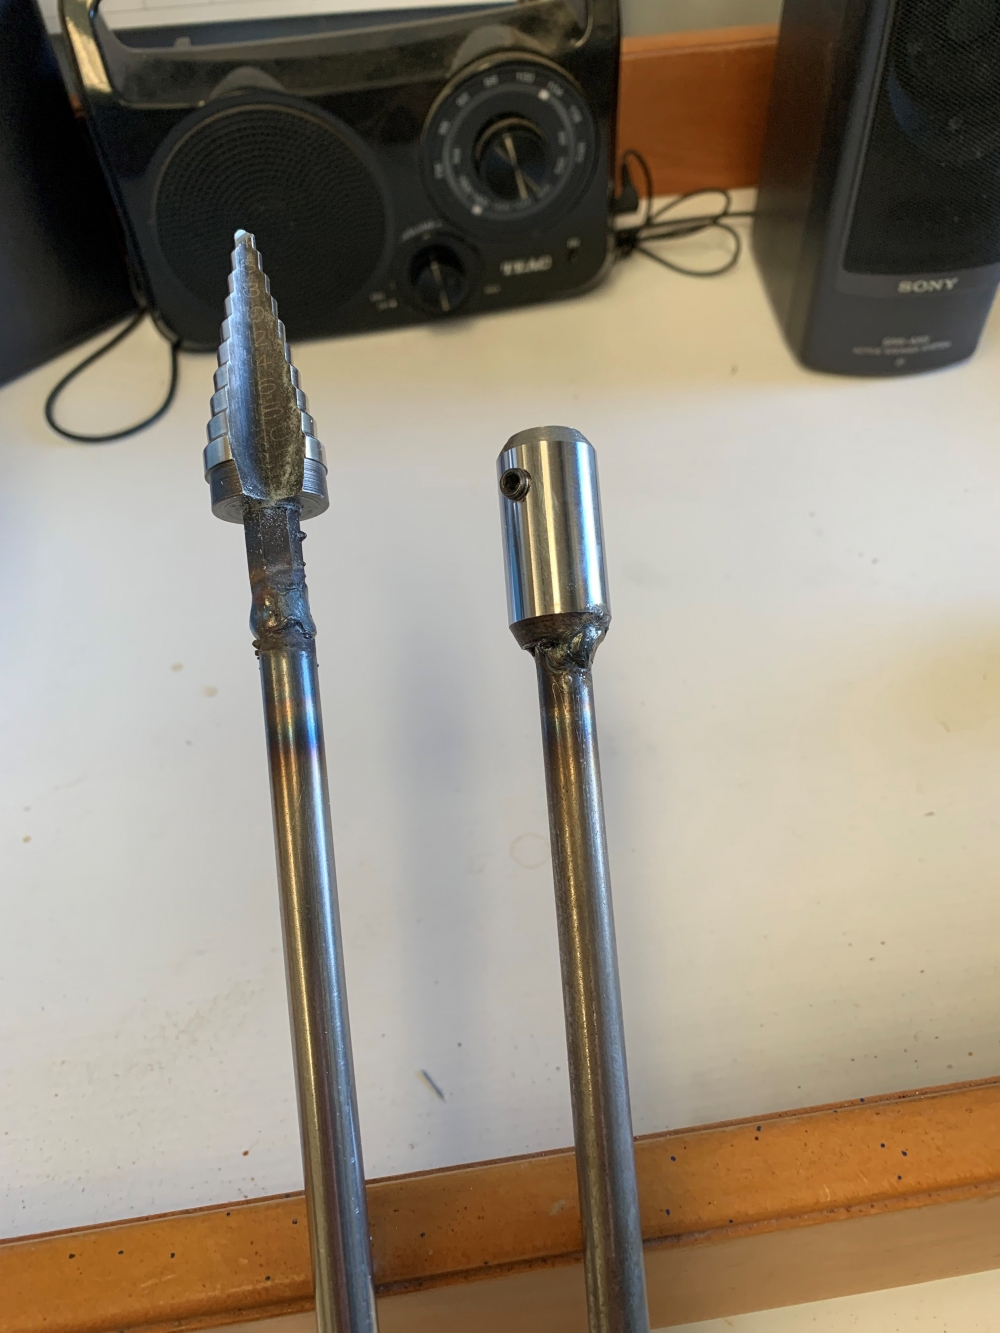
*Now, visit local engineering shop (or you maybe able to do this) weld a 3/4 inch step drill to the end of a 1/2 inch steel rod. The rod lengthmust go just past the aileron bell crank as that is where the first reinforced barrier is. (Half way along the wing.) Weld a joining collar onto another similar steel rod. See photo. Make sure these connectfirmly, with a collar bolt penetrating the steel rod, as you don’t want these rods to separate while drilling and pulling the rods out. See photo. Grind down a flat surface for the collar screw to tighten on or better still drill a hole for it to engage.
*Connect your battery powered drill to the first rod and drill through the tip, or just gingerly use your hands to rotate the drill through the foam, as once past the surface, it is easy drilling through blue foam. Keep it horizontal.
Once you reach the blue foam lightning holes then you will be able to feed the rod right through, without drilling, to the first reinforced barrier. Feel around with the rod to judge half way between top and bottom and once satisfied, drill through the first barrier. Keep drill horizontal. The barrier consist of layed fibreglass bid to strengthen that part of the wing. Once you are through then connect the second steel rod feed the drill bit through the lightning holes to the next barrier and solid blue foam, at the wing root.
*Drill through the barrier and solid foam to reach the last thick wallclose out of the wing root.
* Drill through the last wall and the drill should appear at the wing root wall about 150mm forward of the spar, roughly equal distance fromthe upper and lower surface of the wing.
*You will have to pull the drill and steel rods out from the wing root end.
* Before you do this connect either a long plastic rod, or string or the wire you intend using firmly to the wing tip end of the steel rod to pull it through as you take the drill and rods out.
I used a trailer lighting wire cable from an automotive shop.
*Drill a hole through the fuselage forward of the spar entrance coming through adjacent to the seat. I then put a connector for the three wires easily accessible under the seats, at different lengths so one can feed each wire separately through the fuselage hole, when de-rigging the wings.
* Then I routed the wires behind the interior wall upholstery to the instrument panel to connect with the strobe switch and power sources.
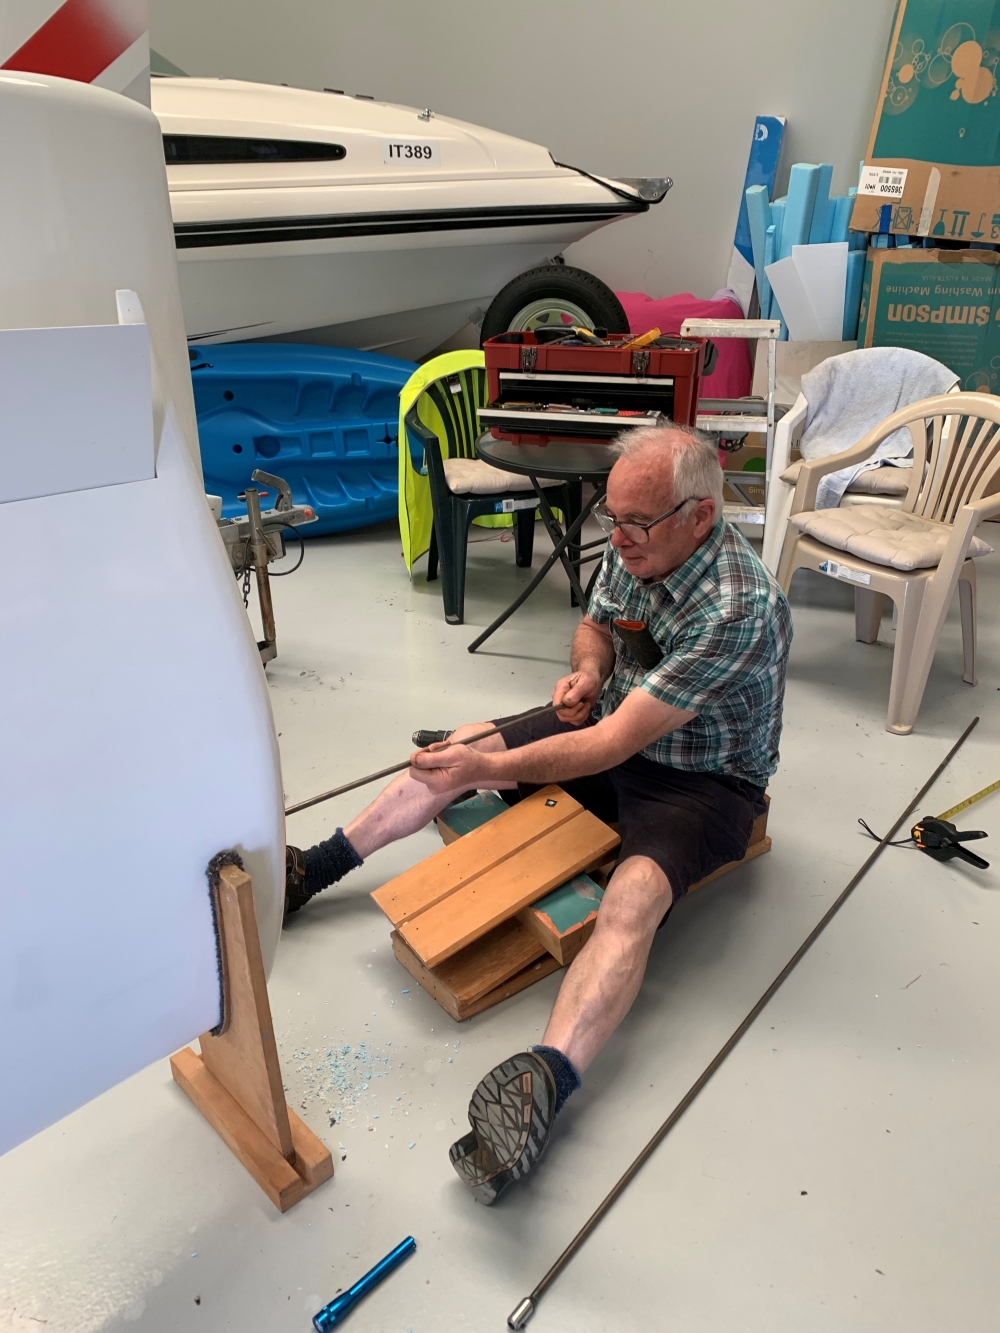
First photo show Phil Richards, another Europa Classic owner and pilot, drilling through the wing tip. Note the second rod and collar at the end. Second photo is feeding the steel rod through the lightning holes to the first barrier.
Third photo shows the two rods and Step Drill and Connecting Collar.
I will send you a separate photo of the lights in place.
Any questions please contact me. All the best.
Cheers, Tim
Tim Ward

Flying Experience
Flying now for 44 years, wow! has that gone so quickly! Initially with a local Aero Club then as an instructor before commercial airline flying. Flew Bristol Freighters and Argosy aircraft with a freighting company in New Zealand before joining Air New Zealand flying the Fokker F27, Boeing 737, 747 for 14 years! too long but a lovely aircraft, 767, living the dream with the Dreamliner 787, and now last 5 years on the 777.
Built the Europa Classic in 1996 to return to real flying. Broke one record! Took 7 years, at the same time got engaged, married, 3 children and still together! Never been done before! Europa was a delight to build, so cleverly thought out and wonderful to fly. Very ingenious, excellent touring aircraft and easy to maintain.
Special Skills/Experience
An airline pilot's wish to be more creative, I have dabbled in architectural design, building furniture, design and building my workshop and house alterations. Great challenges along with children. Want now to build a Kitfox to land in NZ river beds. Have a lot of "crossing oceans" flight time 22,000hrs and now back onto the Londontown runs so hope to catch up with you all in the UK again sometime.
Locality
We live "downunder" in New Zealand and we are on the "mainland" the South Island. Living in Christchurch, the most English city away from England however a little different now after the earthquakes. The Europa ZK-TIM! is in a hangar at Rangiora Airfield about 30 mins away. Have flown 650 hours in TIM, all around NZ. Vision; to put it in a container and ship to the UK, fly around the UK and retrace a relative, Ted Fresson, who started Scottish Airways in the 1920s, and the routes he flew, then fly back to NZ! Any starters?
Aircraft.
ZK-TIM is one of those good looking"Classic" Monowheel, #292.
Rotax 912S ULS with a NZ Airmaster CSU. Speed kit and all mods that came available while building. 7 years to build, 650 hours.
Long range Aux fuel tanks and a MGL avionics package. Blue foam wings, so it floats!
Contact
Please contact me if you venture down under to NZ for a "Europa Chat"( my wife loves! ) and go for a fly to see our lovely young country.
Photo of my son Angus, instructor for Massey Aviation University College my wife/partner Adrienne with Toby. Hannah, my daughter, taking the photo.
newzealandaustralia@theeuropaclub.org

